What if I told you there was a way to implement any API you want to work with ChatGPT while touching minimal code? You wouldn’t believe me right?
Well, meet Flowise, an open source project that integates LangChain (a large language model framework) visually.
Basically you can visually connect any node to any node or building block of LangChain components visually.
For an example, I connected the National Institute of Standards and Technologies’ database to ChatGPT so that I can quickly identify and and attempt to solve recent vulnurabilities.
To get started you need to install Flowise and then run it. It takes care of installing the underlying libraries for you. This is assuming that you have node installed locally as well as node package manager. The following commands install flowise in your global node_modules repository so that you can run it anywhere. Then it starts flowise. By default it runs on port 3000 but you can configure it further. View the full documentation here for more instructions.
npm install -g flowise
npx flowise startAfter this you should be able to connect to flowise and get started using it.
Navigate to http://localhost:3000 to get started.
You may have to go through an initial configuration screen but after you’re through that you should see the Chatflows preselected with the ability to create a new flow. Click on Add New to get Started.

You’ll see a new screen that lets you add components to build your flow.

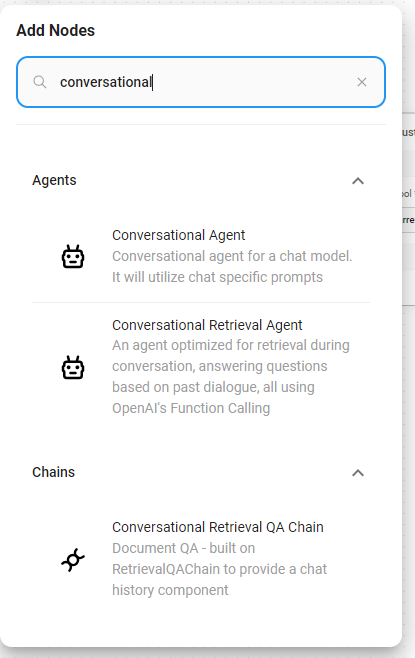
To get started, I find it best to work backwards from the end. You know that you need something that can use open ai’s function calling and you want a function that can call an API, so I found the following best for the task. It’s called the Conversational Retrieval Agent. It will determine which function to call then call that function, and then interpret the results.
After you’ve added that you’ll see a object appear on the screen. This is the base module that your chat is going to interact with.
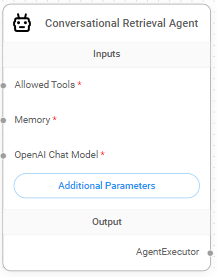
Notice that you can connect allowed tools, a memory store and a model type to it? These are the inputs on the left. On the right you can see that it is a AgentExecutor. This means that you can execute the chat against it or turn it into a chain tool as part of a larger bot. The additional Parameters are parameters for the node that you are modifying.
Now for this example, we are trying to get information from a search API, but you can connect database lookups, web browsing, and other tools to the allowed tools section.
Let’s now integrate our custom API.
Click on that plus icon on the top left again and select “Custom Tool”
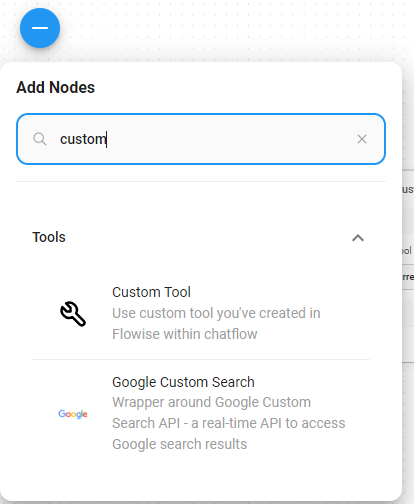
In this custom tool, you can now integrate your custom code to fetch the results from your API. You should see a drop down with nothing in it. Click on it and select Create New. In my example here I’ve already created it.
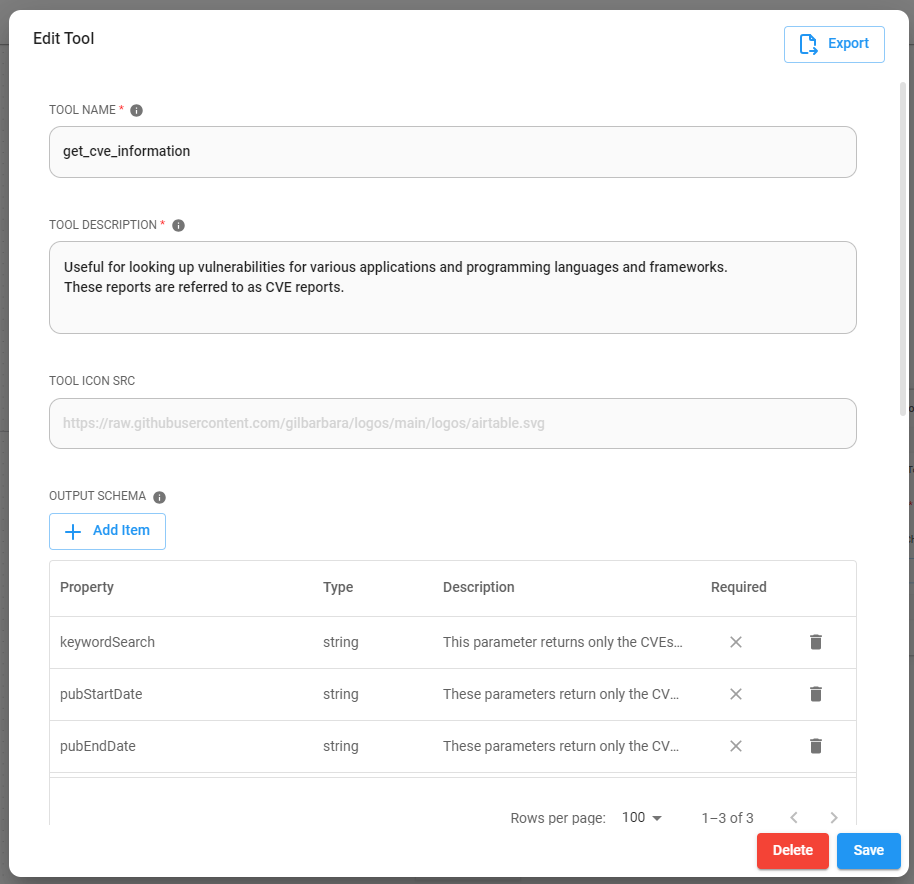
After you click on create new, you’ll be presented with some forms to fill out. Here is what mine looks like. I filled it out based on the API specifications provided by the API provider found here: https://nvd.nist.gov/developers/vulnerabilities. Note I only selected a subset of parameters and copy/pasted the description into the description field. I made sure all the field types are string because queries are strings but your needs may vary. There is a issue where the required state isn’t saved correctly if you go back to modify the output schema due to what I suspect is a deep/shallow copy issue.
The name tells you what the name of the tool is, the description is used by the language model to determine the purpose of the tool and will add to your token count usage. The output schema are the variables the language model needs to know to input and are accessible in your custom code.
If you scroll down you’ll see a location to enter your custom javascript code. Note, this needs to return a string for the large language model to interpret.
const fetch = require('node-fetch');
const { URLSearchParams } = require('url');
console.log("CVE function called!");
function addQueryParam(params, key, value) {
  if (value !== null && value !== undefined) {
    params.append(key, value);
  }
}

const baseURL = 'https://services.nvd.nist.gov/rest/json/cves/2.0';
const queryParams = new URLSearchParams();

addQueryParam(queryParams, 'keywordSearch', $keywordSearch);
addQueryParam(queryParams, 'pubStartDate', $pubStartDate);
addQueryParam(queryParams, 'pubEndDate', $pubEndDate);
addQueryParam(queryParams,'resultsPerPage',2);

const url = `${baseURL}${queryParams.toString() ? '?' + queryParams.toString() : ''}`;
console.log(url);
const options = {
  method: 'GET'
};

try {
  const response = await fetch(url, options);
  const result = await response.text();
  console.log(result);
  return result;
} catch (error) {
  console.error(error);
  return 'There was an error.';
}So I created a basic function that can perform a GET request against the api given some query paramters. The query parameters are prefixed by a “$” which passes through the information from the function call from the large language model. Note: If you want to customize this for your API, provide chatGPT with this code and documentation for your own API and it will rewrite it.
Click the Save button at the bottom.

Now connect your new api connection to the Conversational Retrieval Agent.
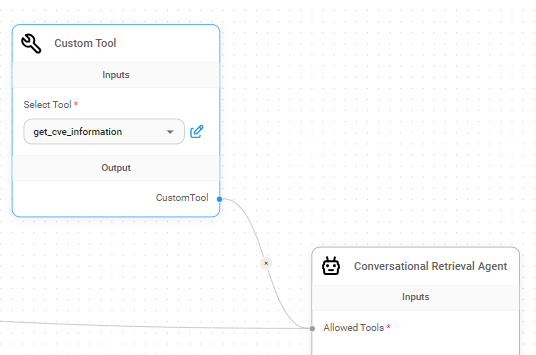
Now we’re done right? Nope. Still have to finish connecting the other inputs to the agent.
Remember that there are two other inputs. Memory, and Model.
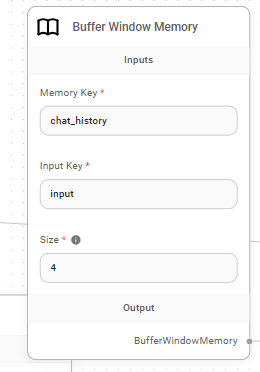
For the memory, you can link a persistent memory store or do what I did that doesn’t persist the memory state but limits the history window as well to reduce token usage. I connected the BufferWindowMemory to the Memory node of the Conversational Retrieval Agent.
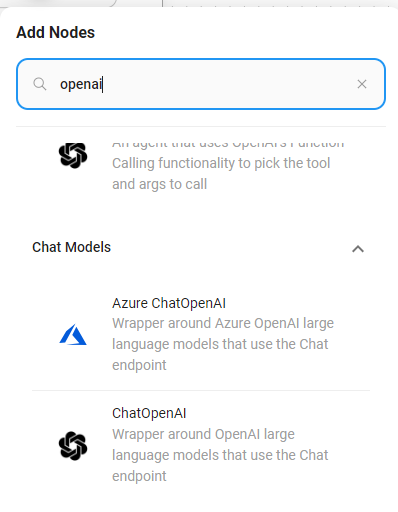
Now this retrieval agent specifically requires an OpenAI Chat model because it uses open ai’s function calling and is conversational with chat history. So add a new node by clicking that + icon on the top right and search for Open AI and select ChatOpenAI
Now you’ve got a node that lets you specify your OpenAI model and associate your api key. Just like with the Custom tool, you’ll see a blank connect credential. Click on the drop down and you’ll be able to “Create New” and enter your OpenAI API Key there. For instructions on how to get your api key.
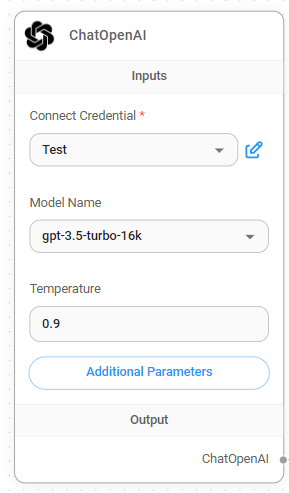
I suggest selecting a slightly larger context window like the 16k, because chaining prompts takes up space in your context and if you want to display more data to the large language model, the more context you need to provide.
Now connect the ChatOpenAI to the OpenAI Chat Models node of the Conversational Retrieval Agent and you have an Chatbot that can interact with an API! Note if you want the bot to response in a specific way, you can add a system message by clicking additional parameters on the node on the Conversational Retrieval Agent.
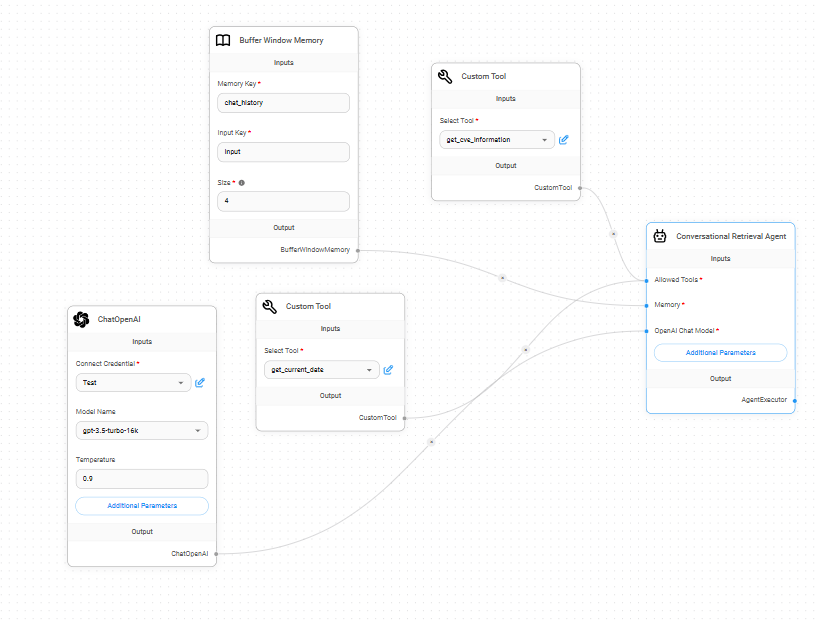
This is what my entire flow looks like. Note: I added another custom tool called get_current_date so that chatGPT knows what today is so that it can use that as a frame of reference when filtering the vulnerability data and just returns the current day in the form of a string.
Here is an example of me querying for latest vulnerabilities on PHP by clicking on the chat icon on the top right.

Now remember you can integrate this with ANY API that you can perform a get request with.
Examples: Look up the weather, add geolocation, look up crime stats, connect to financial data, connect to your emails (platforms that support APIs), create an auto marketer that can send emails, verbosely query databases and data lakes, or even generate entire websites given input from other websites. Share some more ideas in the comments below.
You can find production deployment documentation here at the bottom of the documentation: https://github.com/FlowiseAI/Flowise
For those that want to not use ChatGPT because it calls out to the cloud, you can use LocalAI locally which mimics OpenAI’s API interface which supposedly even supports function calling. I have not tried this because my computers cannot support the hardware requirements yet but if you wanted to run this on your own infrastructure, this might be the way to go.
https://localai.io/features/openai-functions/index.html
As always please use this responsibly and to do good things.
Leave a Reply